
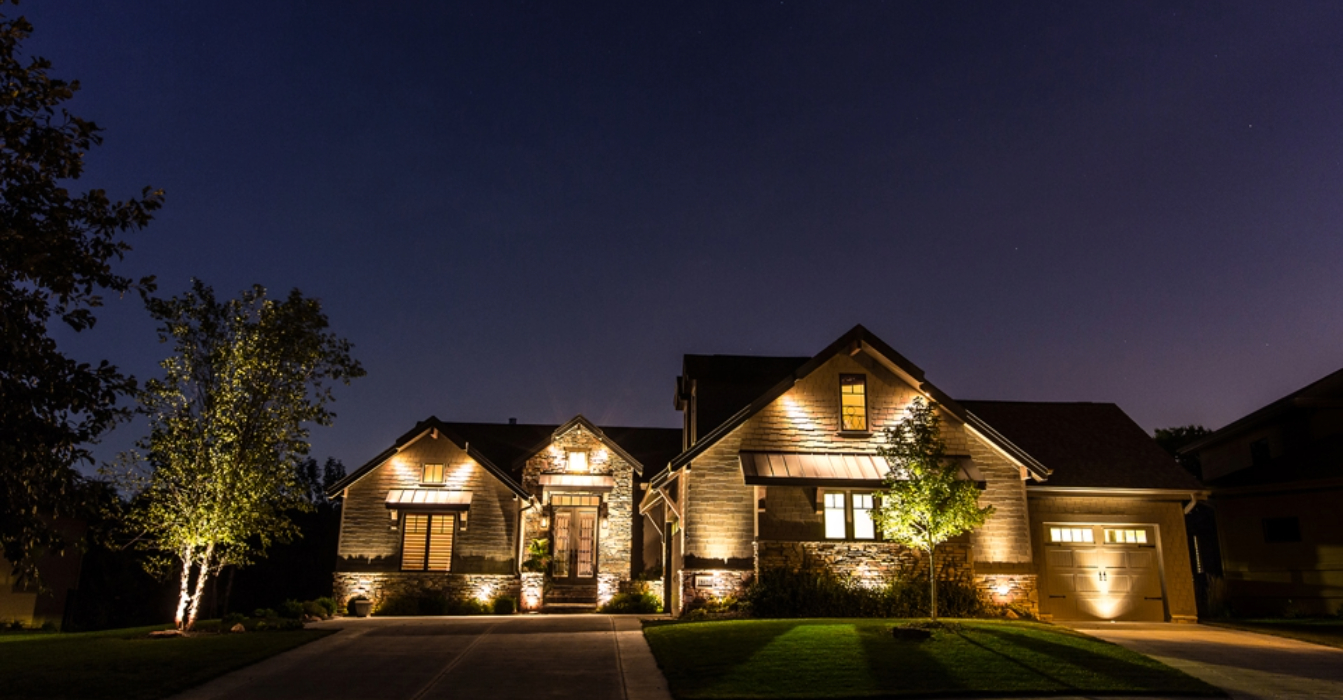
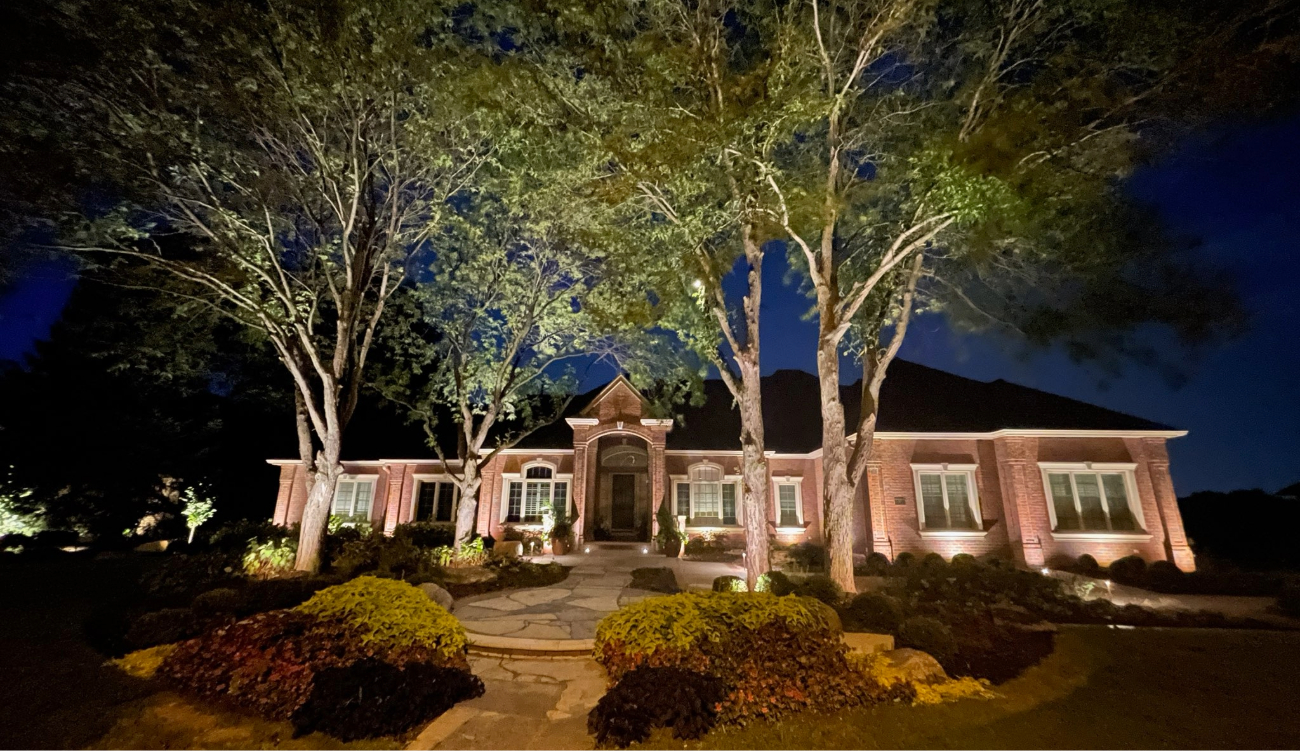
There is a moment that happens at the end of every landscape lighting installation that never gets old. It is the first night reveal, when a homeowner steps outside and sees their property transformed in a way they had only imagined during the planning phase. Trees they have walked past a thousand times suddenly have depth and drama. A pathway they have navigated by memory now feels intentional and welcoming. The front of their home looks like it belongs on the cover of a design magazine rather than disappearing into the dark after sunset.
That moment is the goal of everything that happens before it, and the quality of the outcome depends entirely on the quality of the process. At Midwest Lightscaping, landscape lighting installation is something we have refined over more than 15 years and 1,000-plus completed projects across Omaha and the surrounding Nebraska communities. We have developed a structured, eight-step process specifically because we know that the homeowners who understand what to expect at each stage have a better experience, make better decisions, and end up with results they genuinely love. This guide walks you through that process from the very first contact to the ongoing support that follows.
Why the Process Behind Landscape Lighting Installation Matters
Not all landscape lighting installation companies approach their work the same way, and the differences in process are not cosmetic. A contractor who shows up without prior consultation, places fixtures based on rough intuition, and hands you a remote control on the way out the door is delivering a fundamentally different product than one who spends time understanding your property, your lifestyle, and your goals before a single fixture is placed. The gap in outcomes between these two approaches is significant.
Thoughtful landscape lighting installation is both a technical and a creative discipline. It requires an understanding of how different fixture types, beam angles, and color temperatures interact with specific materials and plant forms. It requires knowledge of how to size and configure a transformer to support the system load safely and efficiently. And it requires an eye for design that understands restraint as well as drama, knowing when a single well-placed fixture accomplishes more than three fixtures in the wrong location. A structured process is what makes all of that consistently achievable rather than accidental.
Check out our expert lighting services to see how we help homeowners reclaim their nights.

Step One: Initial Contact and Scheduling
The process begins the moment you reach out, whether by phone, text, or email. At Midwest Lightscaping, we respond as quickly as possible to every inquiry because we know that the decision to invest in professional landscape lighting is one you have been thinking about, and waiting days for a response is a poor way to start a relationship. During that first contact, we gather some basic information about your property and project, share a little about our process and what to expect, and schedule your initial consultation.
One thing worth knowing from the start: our consultations are free. There is no obligation and no pressure. We believe strongly that homeowners deserve the chance to understand what professional landscape lighting installation actually involves before committing to anything, and a good consultation accomplishes that even if you decide not to move forward immediately.
Step Two: The On-Site Consultation
The initial consultation typically runs 45 to 60 minutes and takes place at your property. This is not a sales visit. It is a genuine discovery session where our lighting designer learns about your goals, your lifestyle, and your aesthetic preferences while walking the property and assessing its characteristics.
We ask questions that might surprise you. How do you use your outdoor space? Are there areas where you feel uncomfortable at night? What is the first thing you want guests to notice when they arrive after dark? Do you entertain on the patio, and if so, how do you want that space to feel? These conversations give us the context we need to design a landscape lighting installation that serves you specifically rather than applying a generic template that could belong to any property on any street.
We also show you examples of past projects during the consultation. Seeing real results from real properties is far more useful than looking at product photography, and it helps us understand quickly which directions appeal to you and which do not. In many cases, we can provide a rough estimate during or shortly after this initial meeting, which means you can often move forward with scheduling your project in the same visit.
Step Three: Custom Design and Planning
After the consultation, our team develops a lighting plan built specifically for your property. This is where the technical and creative work happens before any installation begins. We determine fixture types and placement for each zone of the property, select beam angles and color temperatures appropriate for each application, calculate the system load to size the transformer correctly, and plan the wiring layout to minimize disruption during installation.
We also think about sequencing. Many homeowners prefer to complete a landscape lighting installation in phases, addressing the highest-priority areas first and adding to the system over time as budget allows. Our design process accounts for this from the beginning, ensuring that the initial installation is planned in a way that integrates cleanly with future additions rather than requiring disruptive rework. The plan we deliver is specific to your property and your goals. It is not a template.
Step Four: Client Review and Project Scheduling
Before any work begins, we review the design with you in detail. You see exactly what is planned, where each fixture will be placed, what it is intended to accomplish, and what the project will cost. We walk through the design together and answer every question. If there are adjustments to make, we make them at this stage when changes are easy and free rather than during or after installation when they become complicated and expensive.
Once you are satisfied with the plan and ready to move forward, we finalize the project scope, confirm the timeline, source the materials, and place you on the installation schedule. We keep you informed throughout this stage so you always know where your project stands and when to expect the installation crew.
Step Five: Professional Installation Day
Installation day is when the plan becomes reality. Our skilled technicians arrive on schedule, meet with you to go over the details if you are home, and get to work. Throughout the landscape lighting installation process, we maintain clean, respectful working practices. We are aware of your existing landscaping and take deliberate care to avoid damage. Wiring is buried to appropriate depths, run discreetly, and secured properly. Fixtures are positioned with precision relative to the design plan, then adjusted in the field as needed to account for real-world variables that a site visit cannot always fully anticipate.
We use high-quality, weather-resistant materials throughout. Every connection is made properly, every transformer is configured correctly for the system load, and every fixture is tested before we consider the installation complete. Our goal is to leave your property looking better than we found it, with no evidence of the work we did beyond the fixtures themselves.
Step Six: Daytime Final Inspection
After installation, we conduct a thorough daytime inspection before the nighttime reveal. This step is often skipped by less meticulous contractors, but it serves an important purpose. In daylight, we verify that every fixture is properly secured and positioned, that wiring is properly concealed and protected, that transformer settings are correct, and that the overall installation meets the specifications in the design plan. Any adjustments identified during this inspection are made before the evening walkthrough, which means the first night reveal reflects the system at its best rather than at a work-in-progress state.
Step Seven: The Nighttime Reveal
This is the moment that every landscape lighting installation is building toward. We walk the property with you after dark, reviewing each zone and each fixture placement. Our designers approach this walkthrough the way a photographer approaches a final edit, looking at every detail with a critical eye and making fine adjustments on the spot. Fixture angles are tweaked. Beam intensities are dialed. Anything that does not meet our standard is addressed immediately or, if it requires a return visit, scheduled for the very next day.
We will not consider the project complete until you are genuinely pleased with what you see. The nighttime reveal is also when we walk you through operating the system, explaining how to use timers, smart controls, or app-based management depending on the package you selected. By the end of the evening, you should feel completely comfortable with how your system works and confident in what it does for your property.
Step Eight: Ongoing Support and Maintenance
A landscape lighting installation is not a one-time transaction. It is the beginning of a long-term relationship between you, your property, and the lighting system that serves it. Plants grow, landscapes change, and fixtures require periodic attention to continue performing at their best. Midwest Lightscaping offers structured maintenance programs ranging from a single annual service visit to monthly care for larger properties.
Every maintenance visit includes fixture adjustments to account for plant growth, lens cleaning to remove hard-water deposits, component testing including photocells, timers, and transformers, selective lamp replacement as needed, and a service summary that documents what was done and flags anything requiring attention. Our monthly maintenance program includes an exclusive lifetime warranty on fixtures and components, which reflects both the quality of what we install and the confidence we have in how we maintain it.
Beyond scheduled maintenance, we remain available for questions, concerns, and future additions to your system. Many of our clients have expanded their landscape lighting installation over the years as they see what is possible and want to bring more of their property to life after dark. Because we design with phased expansion in mind from the beginning, adding to an existing system is clean and efficient.
Curious what we can do for your space? Visit our image gallery to see our work in action.
Frequently Asked Questions About Landscape Lighting Installation
How long does a typical landscape lighting installation take?
Most residential landscape lighting installations are completed in one to two days. A standard front-yard system with pathway lighting, facade accents, and a few tree uplights can typically be completed in a single day by an experienced crew. Larger whole-property systems covering both front and back yards, multiple zones, and extensive fixture counts may take two days or occasionally longer. Commercial landscape lighting installations vary more widely depending on the scale of the property and the complexity of the electrical requirements. The design and planning phase that precedes installation typically takes one to two weeks from consultation to approved plan, depending on project scope.
Is landscape lighting installation a DIY-friendly project?
Basic low-voltage landscape lighting kits are marketed as DIY-friendly, and for a small, simple project, a capable homeowner can achieve a functional result. However, the gap between a functional DIY installation and a professionally designed and installed system is substantial. Professional installation addresses transformer sizing, voltage drop across long cable runs, fixture placement geometry, beam angle selection, and design cohesion across zones in ways that generic kit instructions cannot. Most homeowners who start with DIY systems and later invest in professional landscape lighting installation describe the difference as night and day, both literally and in terms of their satisfaction with the result.
What is voltage drop, and why does it matter in landscape lighting?
Voltage drop occurs when electrical resistance in the wiring cable reduces the voltage that reaches fixtures at the far end of a run from the transformer. In a landscape lighting installation, voltage drop can cause fixtures farther from the transformer to produce noticeably dimmer light than those closer to it, creating an uneven and visually inconsistent result. Managing voltage drop requires careful cable sizing, strategic home-run wiring from the transformer, and in some cases multiple transformer outputs or the daisy chain versus home-run wiring topology. It is one of the more technically demanding aspects of landscape lighting installation that separates professional work from amateur attempts.
How deep should landscape lighting wire be buried?
Low-voltage landscape lighting cable should be buried at a minimum depth of 6 inches in areas where it will not be subject to regular digging, and 12 inches or deeper in planting beds that are regularly turned over or in lawn areas where aeration equipment is used. Shallow burial is one of the most common causes of accidental cable damage during routine lawn and garden maintenance. In areas where cable must cross under paved surfaces like driveways or sidewalks, it should be run through conduit for protection and to allow future replacement without breaking up the paved surface.
What time of year is best for landscape lighting installation?
Landscape lighting installation can be completed in any season in most climates, though spring and fall tend to offer the most comfortable working conditions and the most accurate assessment of how the lighting will interact with the landscape at its most active. Summer installations are also very common and allow homeowners to enjoy their new system during the peak outdoor living season. Winter installations are possible in most conditions, though frozen ground can complicate cable burial in regions with significant frost depth. If your goal is to have the system ready for entertaining season, scheduling your consultation in late winter or early spring gives the process plenty of time to unfold without rushing.
Experience the Midwest Lightscaping Difference
Landscape lighting installation done well is one of the most transformative improvements you can make to a property. It changes how the space looks, how it feels, how safe it is, and how much you actually use it after dark. But the result is only as good as the process behind it, and the process is only as good as the people executing it.
Midwest Lightscaping in Omaha has spent over 15 years building a reputation for exactly the kind of process-driven, detail-oriented landscape lighting installation that consistently delivers results worth talking about. Our Best of Omaha recognition every year since 2015, including consecutive first-place finishes from 2021 through 2025, reflects a consistent standard of work that our clients experience directly. The testimonials we receive are not about fixtures or technology. They are about the experience of working with a team that listens, delivers, and stays invested in the outcome long after installation day.
If you are ready to see what your property looks like after dark when it is lit the right way, contact Midwest Lightscaping today at (402) 509-2810. You can also reach us through midwestlightscaping.com to schedule your free consultation. We look forward to walking your property with you and showing you exactly what is possible.