
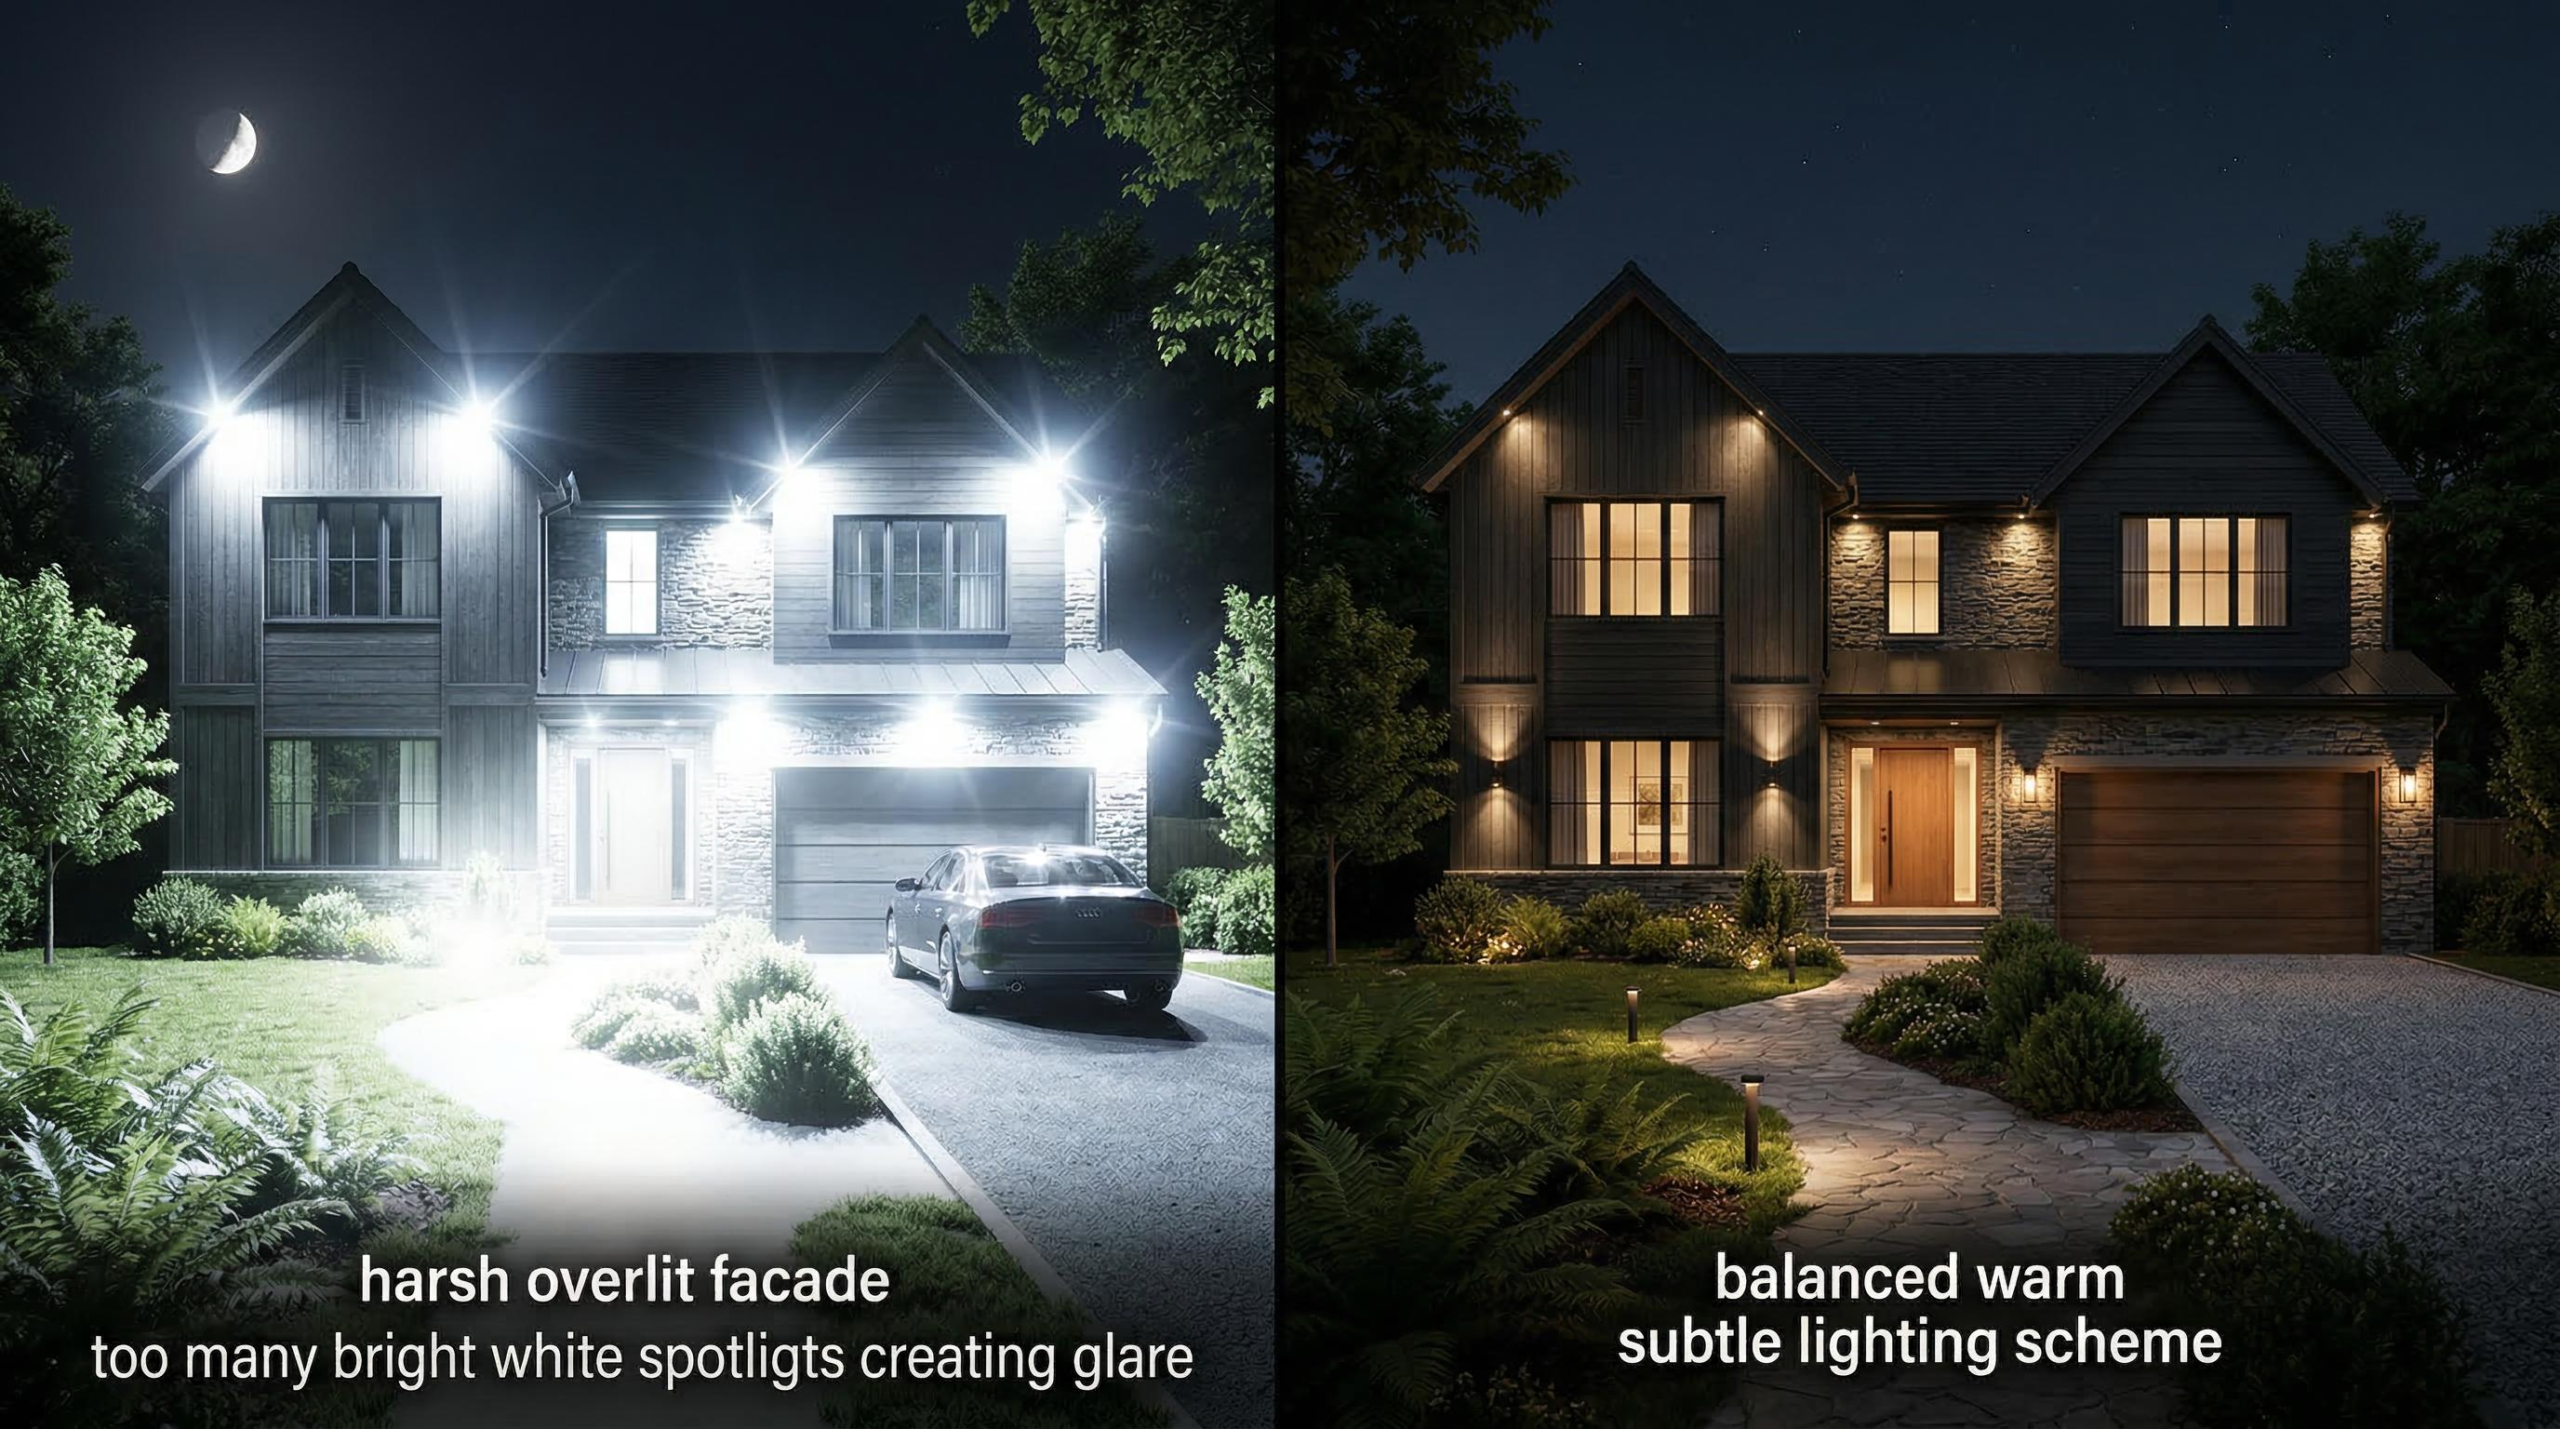
Landscape lighting can highlight your home’s architecture, bring attention to beautiful landscaping, and make outdoor areas more comfortable to use after dark. However, poor planning or installation can lead to uneven illumination, excessive glare, visible wiring, and other problems that affect the appearance and performance of the entire system.
Some landscape lighting mistakes happen during the initial design, while others become noticeable as plants grow, fixtures shift, or components wear out.
Understanding these problems can help you make better decisions when planning a new installation or improving an existing system.
At Midwest Lightscaping, we’ve been designing outdoor lighting systems in Omaha and the surrounding areas since 2011. Our approach to residential outdoor lighting begins with understanding the property, its architecture, landscaping, and how each space will be used.
Below are 14 common landscape lighting mistakes, what causes them, and how to avoid or correct them.
Common Landscape Lighting Mistakes
| Common mistake | What can go wrong |
| 1. Skipping the design plan | Lighting feels disconnected from the property |
| 2. Choosing the wrong fixtures | Poor beam coverage, unwanted glare, or unsuitable lighting effects |
| 3. Using too much or too little light | The yard looks washed out, or important areas are difficult to see |
| 4. Ignoring viewing angles | Lighting looks good from one location but uncomfortable from another |
| 5. Poor transformer and wiring planning | Voltage problems, unreliable operation, or limited capacity |
| 6. Incorrect fixture aiming | Glare makes lights uncomfortable to look toward |
| 7. Improper fixture spacing | Uneven brightness and distracting light patterns |
| 8. Mixing color temperatures | Inconsistent shades of white throughout the landscape |
| 9. Poor pathway light placement | An overly rigid appearance or inadequate walkway lighting |
| 10. Light shining into windows | Unwanted brightness inside the home |
| 11. Ignoring uneven brightness | Some fixtures appear dimmer than others |
| 12. Exposed wiring or unstable fixtures | Poor daytime appearance and increased risk of damage |
| 13. Using unsuitable outdoor fixtures | Moisture, corrosion, and premature component problems |
| 14. Neglecting maintenance | Declining light quality and fixtures moving out of position |
1. Installing Landscape Lighting Without a Clear Design Plan
One of the most important landscape lighting mistakes happens before installation begins: choosing fixtures and locations without considering how the entire property should look and function after dark.
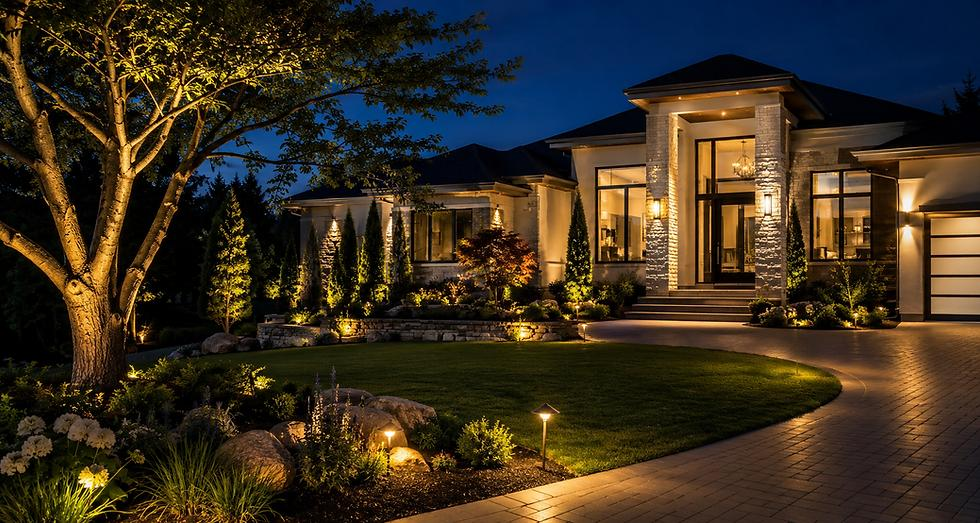
A successful outdoor lighting design should complement the architecture, landscaping, and the way different spaces are used. Without a coordinated plan, some areas may be excessively bright while others receive little attention. For example, illuminating every tree at the same brightness can reduce the visual impact of the property’s most distinctive features. Similarly, poorly positioned lights may create glare when viewed from a patio or driveway.

How to avoid this mistake
Start with a design plan that considers:
- Architectural features, textures, and materials worth highlighting.
- Trees, gardens, and other landscape focal points.
- Views from the street, windows, patios, and outdoor seating areas.
- Walkways, steps, and entrances that need functional illumination.
- The desired atmosphere of each space.
- Fixture placement, beam spread, brightness, and color temperature.
- Electrical requirements and future landscape changes.
A thoughtful lighting plan connects these elements instead of treating each fixture as an individual addition.
2. Choosing the Wrong Lighting Fixtures
Not all landscape lighting fixtures are designed for the same purpose. A fixture that works well for illuminating a tall tree may not provide suitable lighting for a walkway. Likewise, a narrow spotlight may create an overly concentrated beam on a wall where softer, wider illumination would be more appropriate. Even a high-quality fixture can produce poor results when used in the wrong location.
How to avoid this mistake
Select fixtures based on the lighting effect you want to achieve.
Common options include:
- Path lights: Illuminate walkways, garden paths, and transitions between outdoor spaces.
- Spotlights: Direct light toward trees, architectural details, and selected focal points.
- Floodlights: Provide broader illumination where appropriate.
- Well lights: Offer discreet uplighting in suitable ground-level locations.
- Hardscape lights: Illuminate steps, retaining walls, and other built features.
Beyond the fixture type, consider brightness, beam angle, shielding, color temperature, and mounting position. Some applications also benefit from diffused light, which helps soften harsh transitions and create more balanced illumination. The fixture should support the design, not determine it.
3. Using Too Much or Too Little Landscape Lighting
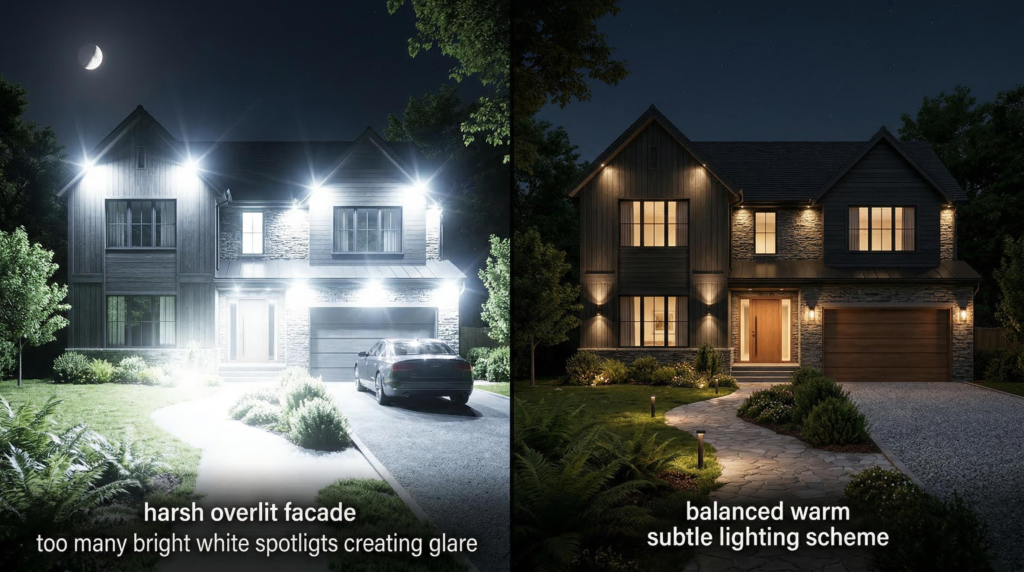
More outdoor lighting doesn’t always produce a better result. When every tree, wall, and garden bed receives the same level of illumination, the property can lose depth and contrast. Excessively bright fixtures may also create uncomfortable glare or unwanted light beyond the intended area. At the same time, insufficient lighting around steps, entrances, and walkways can make those spaces difficult to navigate after dark.
How to avoid this mistake
Use different lighting levels according to the purpose of each space. For example, a mature tree may receive accent lighting to highlight its shape, while a walkway requires more consistent illumination for visibility. The goal is not to illuminate every part of the property equally. Instead, create a visual hierarchy that emphasizes important features while maintaining appropriate lighting in functional areas. A balanced design can enhance the property without overwhelming its natural appearance.
4. Ignoring How Landscape Lighting Looks From Different Angles
Landscape lighting should be evaluated from more than one viewing position. A tree may look beautifully illuminated from the driveway, but the same fixture could produce uncomfortable glare from a nearby patio. Lighting that enhances a home’s front elevation may also appear too bright when viewed through a window. These problems often occur when fixture placement is planned from a single perspective.
How to avoid this mistake
Consider the main locations from which the lighting will be viewed, including:
- The street and driveway.
- The front entrance.
- Patios and outdoor seating areas.
- Main living spaces inside the home.
- Neighboring properties.
Fixture angles, brightness, and shielding should be adjusted to achieve the intended effect from these different locations. For example, moving an uplight slightly or selecting a narrower beam may preserve the illumination on a tree while reducing glare from the patio. Evaluating these sightlines during the design stage can prevent problems that would otherwise require adjustments after installation.
5. Choosing the Wrong Transformer Size or Wiring Layout
Electrical planning is an important part of landscape lighting design, particularly for low-voltage systems. A transformer converts household electricity to the lower voltage used by landscape lighting fixtures. If the transformer is not properly sized for the connected load, the system may operate unreliably or have insufficient capacity for future additions. Poor wiring design can also affect performance. Long cable runs, undersized wiring, excessive electrical loads, and unsuitable connections can contribute to voltage drop or other problems.
How to avoid this mistake
Transformer and wiring selection should account for:
- The combined power requirements of the fixtures.
- Cable lengths and wire sizes.
- The number and arrangement of lighting circuits.
- The operating voltage range of the fixtures.
- Possible future additions.
There is no single transformer size or wiring layout that works for every property.
A properly designed system distributes power according to the requirements of the equipment and installation. Planning the electrical system alongside the lighting design helps reduce performance problems and unnecessary changes after installation.
6. Positioning Landscape Lights Where They Create Glare
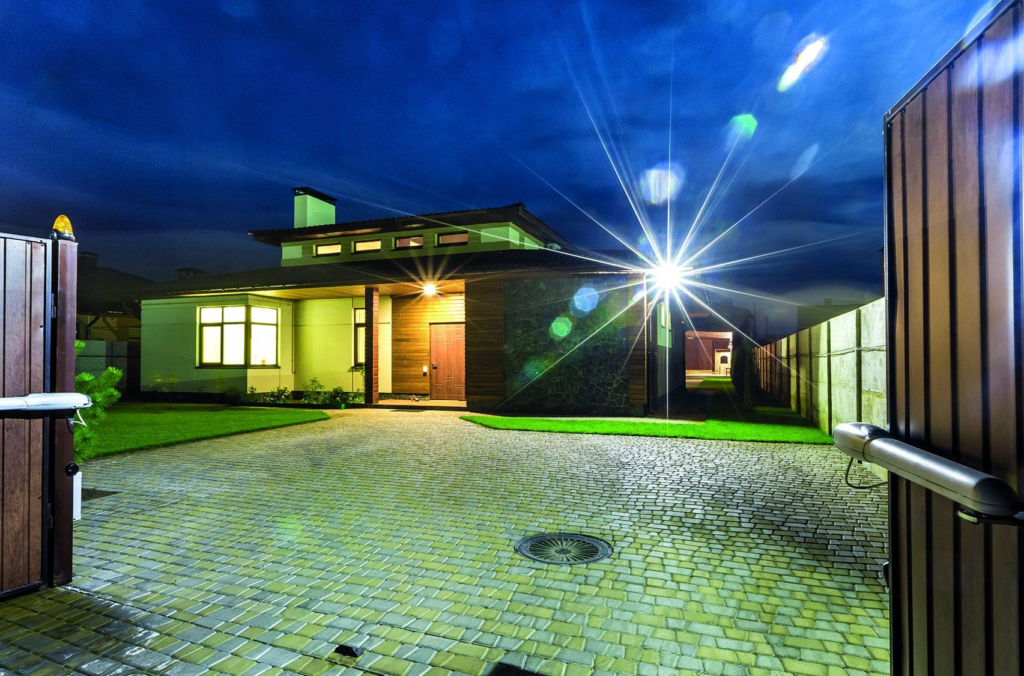
Glare occurs when a light source or overly bright illuminated surface makes it uncomfortable to look toward an area. In residential landscapes, this often happens when a fixture is aimed too high, positioned in a direct line of sight, or produces more light than the application requires. For example, an uplight may illuminate a tree effectively while also shining toward someone standing near the driveway.

How to fix it
The solution depends on the fixture and its location.
Possible adjustments include:
- Changing the fixture’s aiming angle.
- Moving it to a less exposed position.
- Installing an appropriate glare shield.
- Reducing the light output.
- Selecting a fixture with better beam control.
A well-designed system should emphasize the illuminated feature rather than the light source. When assessing glare, consider how the lighting appears from the street, driveway, front entrance, and outdoor living areas.
7. Placing Landscape Lighting Fixtures Too Far Apart or Too Close Together
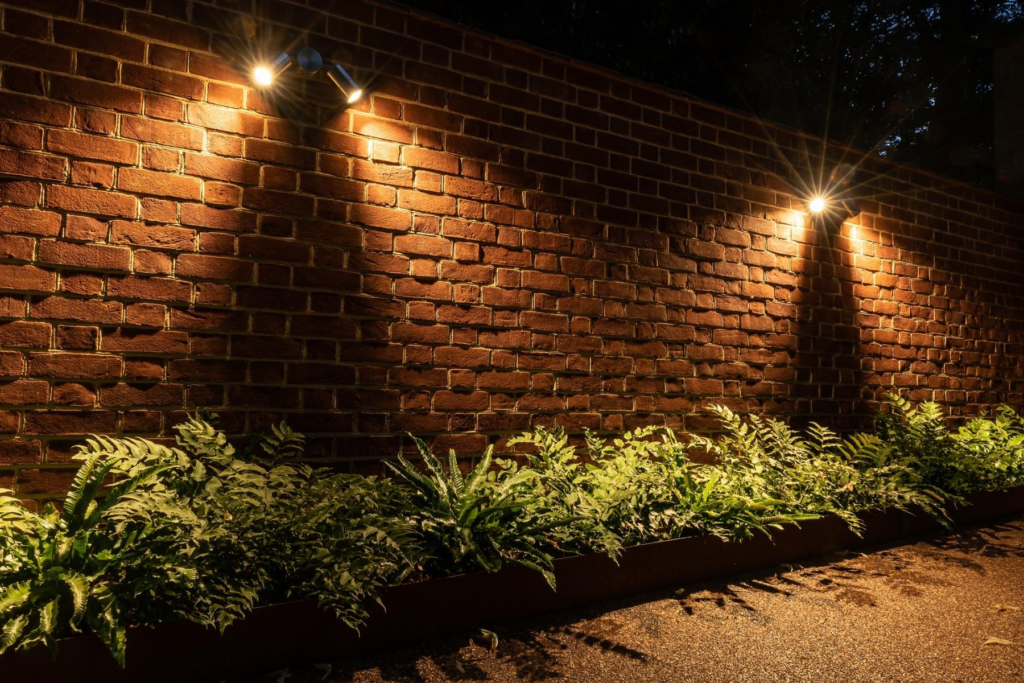
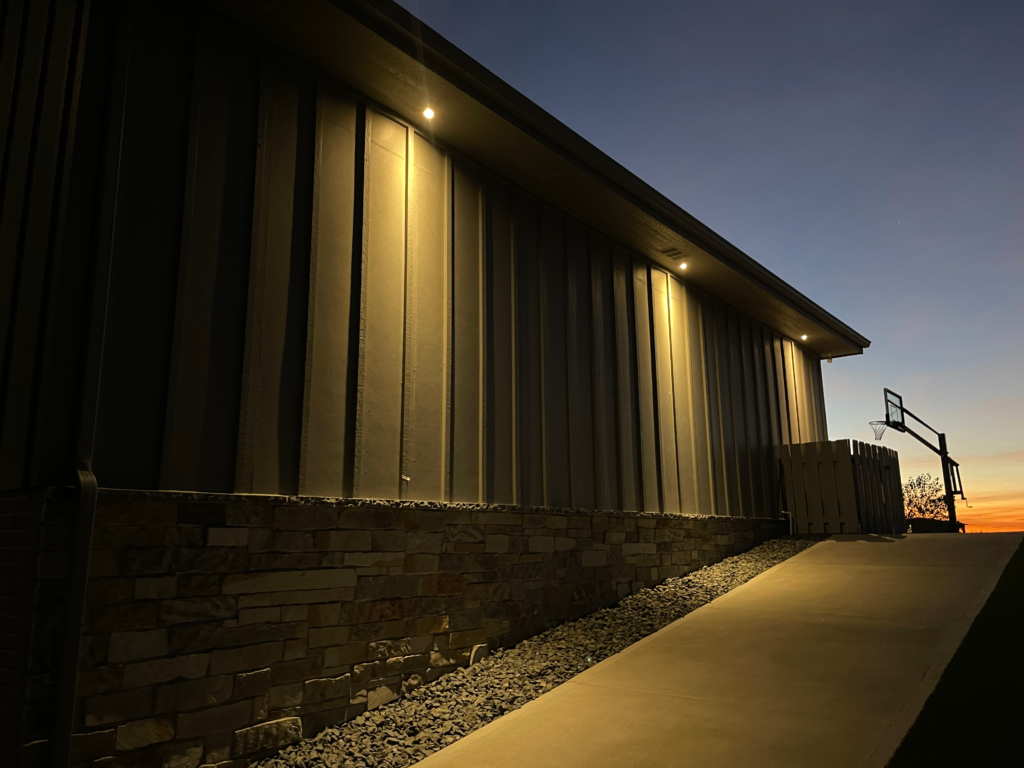
Incorrect fixture spacing can produce uneven illumination and distracting patterns. When lights are too far apart, noticeable dark gaps may appear between illuminated areas. Fixtures placed too closely together can create overlapping bright spots. On walls, poor spacing or beam selection may also create repeated arcs of light, sometimes called scalloping. However, spacing isn’t always the only cause. Beam width, mounting height, fixture brightness, and aiming direction also affect the result.
How to fix it
- Evaluate how the light spreads after dark. Some installations can be improved by adjusting the fixture angles. Others may require changing the beam spread, repositioning fixtures, or modifying the layout.
- Diffusion and softer transitions can also help where harsh, concentrated light patterns are distracting. There is no universal spacing distance that works for every property.
- The correct arrangement depends on the intended lighting effect and the surrounding landscape.
8. Mixing Different Landscape Lighting Color Temperatures
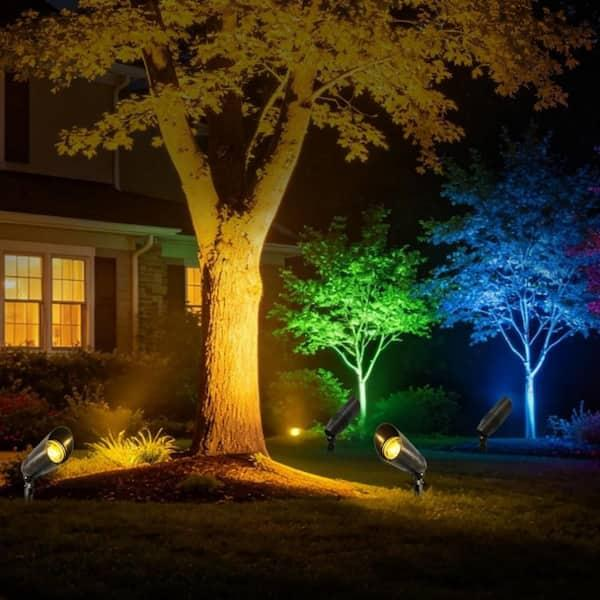
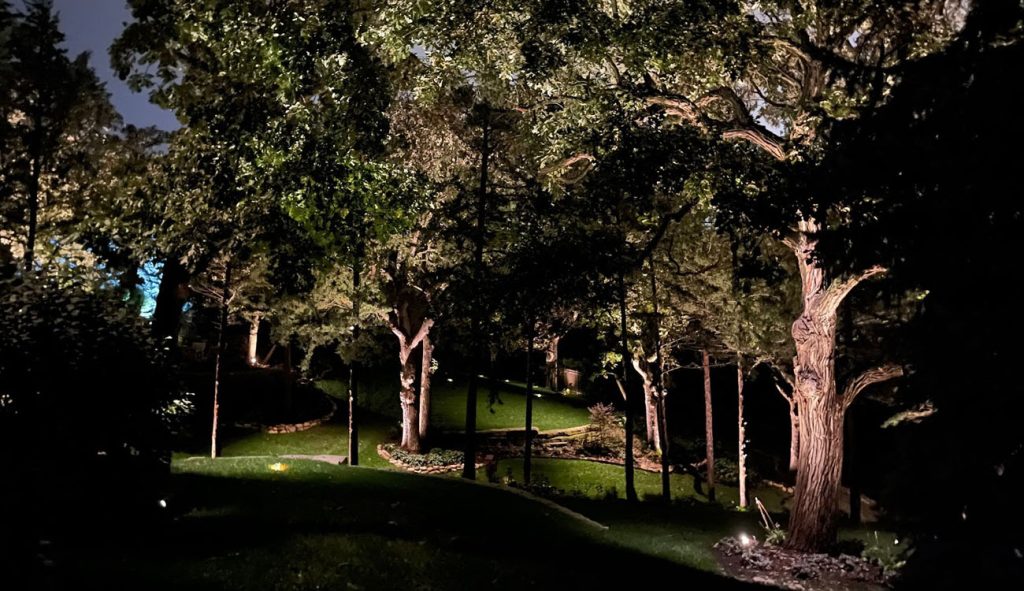
When outdoor lights produce noticeably different shades of white, the landscape can appear inconsistent. Some fixtures may create warm, slightly yellow illumination, while others look cooler or bluish. This difference is often caused by mismatched color temperatures.
Color temperature is measured in Kelvin (K). Lower values produce warmer-looking light, while higher values create a cooler appearance. For residential landscapes, warm-white lighting around 2700K to 3000K is commonly used, although the best selection depends on the architecture, materials, and desired atmosphere.
How to fix it
- Check the color temperature of existing fixtures and replacement light sources. Using consistent color temperatures across related areas can create a more cohesive appearance.
- Brightness and beam spread should also be considered. Two fixtures with the same color temperature may still produce different results if their outputs or optical designs vary.
- Different color temperatures can be used intentionally, but they should contribute to the overall design rather than create accidental inconsistencies.
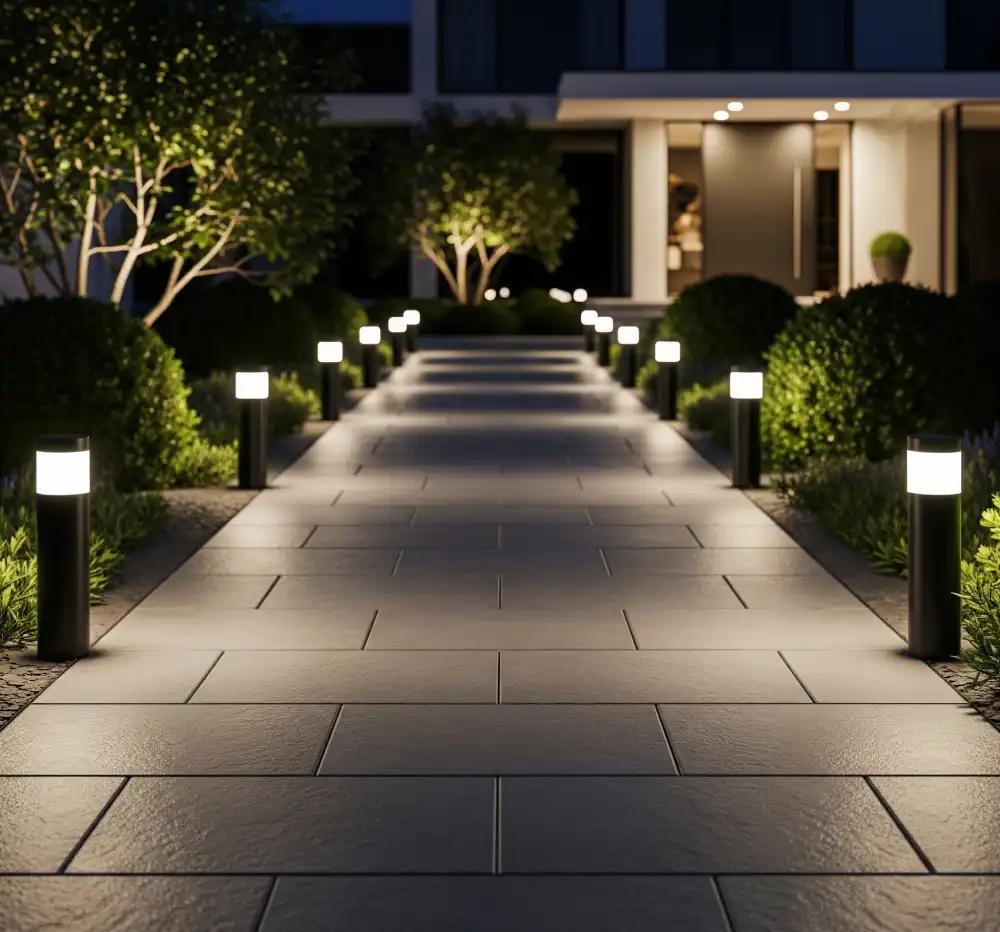
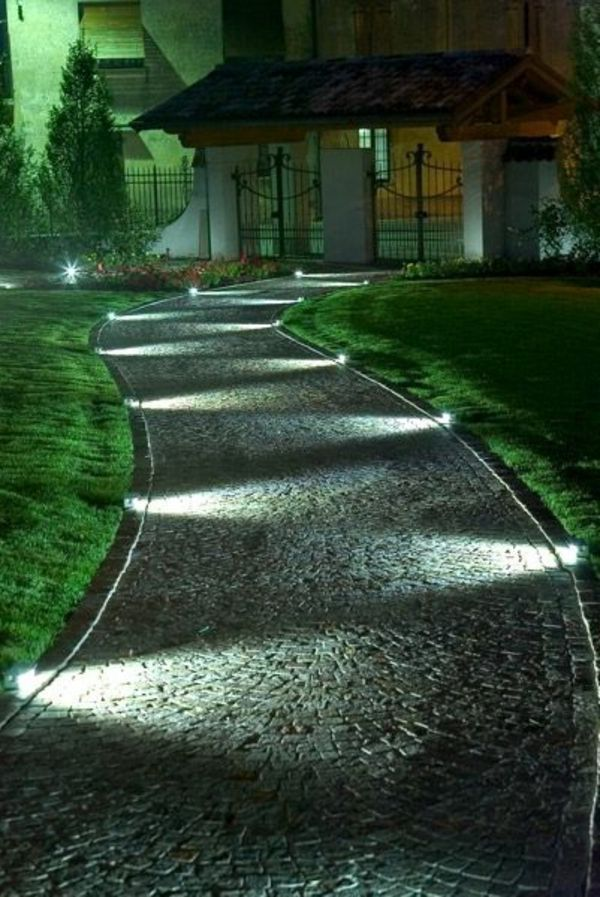
9. Placing Path Lights in Straight, Evenly Matched Rows
Pathway lighting should help people navigate outdoor spaces while complementing the landscape. When lights are placed directly opposite one another at regular intervals, the result can resemble an airport runway. This rigid appearance may draw more attention to the fixtures than the walkway itself.
How to fix it
- Staggering pathway lights often creates a softer, more natural arrangement.
- However, symmetrical lighting isn’t always a mistake. It may be appropriate for formal entrances or structured landscape designs.
- Fixture placement should reflect the path’s shape, surrounding features, and required illumination.
- Pay particular attention to curves, steps, intersections, and elevation changes.
- The goal is to provide adequate visibility without overcrowding the path or creating distracting patterns.
10. Allowing Landscape Lights to Shine Into Windows
Outdoor lighting should improve the property without creating unwanted brightness inside the home. Light shining through windows is often caused by poor fixture aiming or placement.
Seasonal changes can also contribute to this problem. For example, an uplight aimed toward a tree may be partially blocked by leaves during summer. Once those leaves fall, the light may travel through the branches toward a nearby window.

How to fix it
- Check the lighting from inside the home after dark.
- If a fixture produces unwanted brightness, adjusting its angle, relocating it, or adding appropriate shielding may help.
- It’s also important to consider nearby properties so that lighting does not create unnecessary disturbance for neighbors.
- In Omaha, changing foliage makes seasonal adjustments particularly useful.
- Reviewing fixture angles in spring and fall can help maintain the intended lighting effect throughout the year.
11. Ignoring Landscape Lights That Are Dimmer Than Others
If some landscape lights appear noticeably dimmer than nearby fixtures, the system may have an electrical or component-related problem.
One possible cause is voltage drop.
In low-voltage systems, resistance along the wiring reduces the voltage available at the fixtures. This can become significant when cables are too long or too small for the connected load. Other possible causes include loose connections, damaged wiring, failing fixtures, or unsuitable power distribution.
How to fix it
- A lighting professional can inspect the system and measure the voltage reaching different fixtures.
- Depending on the findings, the solution may involve repairing connections, replacing faulty components, or changing the wiring layout.
- Installing brighter bulbs isn’t necessarily the answer and may increase the electrical load.
- Addressing the underlying cause helps restore consistent performance without introducing additional problems.
12. Leaving Wires Exposed or Fixtures Poorly Secured
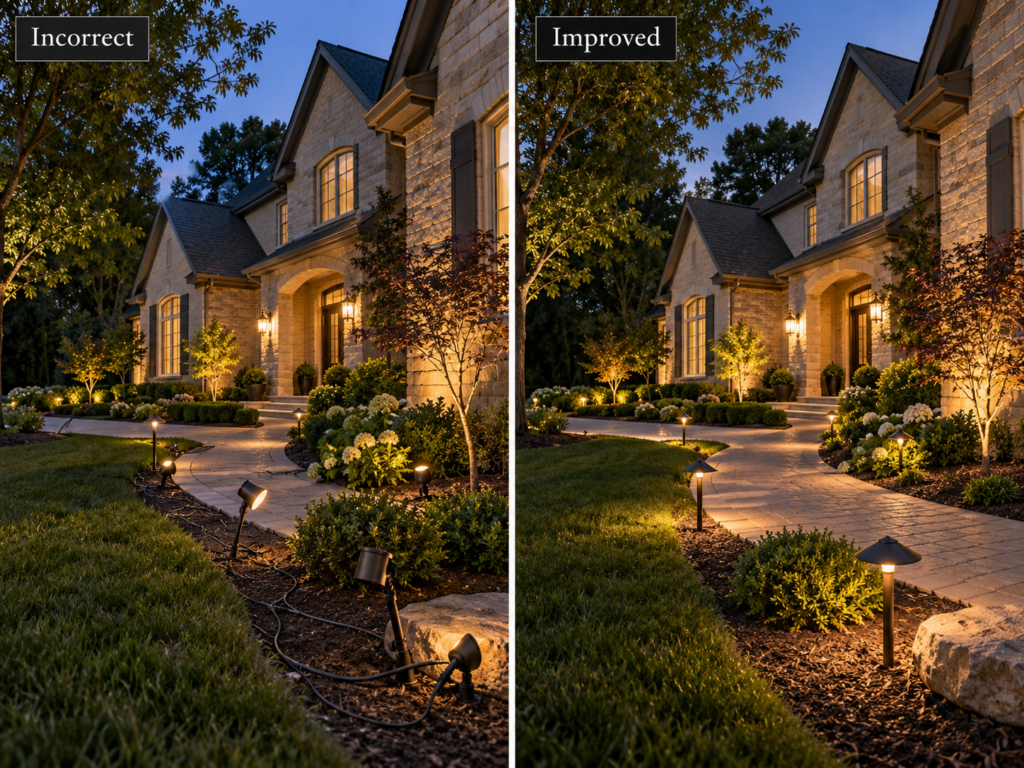
Landscape lighting should look intentional during the day as well as at night. Exposed wires, leaning fixtures, and loose mounting stakes can make an installation appear unfinished. They can also increase the risk of damage during routine landscaping activities. For example, wiring left exposed near planting beds may be damaged by gardening tools, while poorly secured fixtures can move out of alignment after mowing or seasonal ground changes.
How to fix it
- Outdoor wiring should be suitable for the installation and installed according to applicable electrical requirements and manufacturer instructions.
- Where cables are buried, the correct depth and protection depend on the wiring method and location.
- Fixtures should be mounted securely and positioned to minimize accidental damage.
- Not every landscape light needs to be hidden. Decorative path lights and other visible fixtures may be intentional elements of the design.
- The important consideration is that the installation looks coordinated and remains protected during normal use.
13. Using Fixtures That Are Not Suitable for Outdoor Conditions
Landscape lighting fixtures are exposed to rain, snow, irrigation water, humidity, and changing temperatures. Products that aren’t suitable for the installation environment may develop corrosion, moisture problems, or premature component failures. One possible warning sign is repeated water accumulation inside a fixture. Temporary condensation can occur during temperature changes and doesn’t always indicate a failed seal. However, standing water, persistent internal fogging, corrosion, or recurring electrical problems should be investigated.
How to fix it
- Select fixtures rated for the conditions in which they’ll be installed. Material quality also matters.
- Well-constructed brass, copper, and properly finished aluminum fixtures can perform well outdoors, depending on their design and environmental exposure.
- Seals, drainage, connectors, and installation quality are equally important.
- For properties in Omaha, fixtures may also be exposed to freezing temperatures, snow, irrigation, and deicing salts.
- Choosing durable components and installing them correctly helps support long-term system performance.
14. Neglecting Landscape Lighting Maintenance
Even a carefully designed landscape lighting system needs periodic maintenance. As plants grow, they may block fixtures or change how light reaches architectural and landscape features. Seasonal ground movement, landscaping work, and weather can also affect fixture positions. Over time, lenses may collect dirt, connections can deteriorate, and lighting controls may need adjustment. Without maintenance, the appearance of the original design can gradually change.
How to avoid this mistake
- Inspect the lighting system periodically, particularly after significant landscaping changes or severe weather.
- Maintenance may include cleaning lenses, adjusting fixtures, checking wiring connections, testing controls, and identifying damaged components.
- Spring and fall are useful times to assess outdoor lighting in Omaha because seasonal changes can affect both the landscape and the direction of the light.
- Midwest Lightscaping offers outdoor lighting maintenance services in Omaha that include fixture adjustments, lens cleaning, component testing, transformer checks, and assessments of changes in the landscape.
Regular maintenance helps preserve the original design and identify performance problems before they become more extensive.
How to Check Your Landscape Lighting for Common Mistakes
Many landscape lighting problems can be identified through a visual inspection after dark.
Here are five areas to review.
1. View the property from the street. Look at how the lighting highlights the architecture and landscaping. Check for excessive glare or areas that appear unnecessarily bright.
2. Walk along the main pathways. Notice whether steps, entrances, and walkways have adequate illumination without distracting bright spots or dark gaps.
3. Compare the fixtures. Look for differences in brightness, color temperature, or lighting patterns that appear unintentional.
4. Check the lighting from inside the house. Identify fixtures that create unwanted brightness through windows or interfere with views of the landscape.
5. Inspect the installation during daylight. Look for leaning fixtures, exposed wiring, damaged components, or signs of persistent moisture.
These observations can help identify areas that may need adjustment or professional inspection.
If the problem involves electrical components, avoid attempting repairs without the appropriate experience and qualifications.
Thoughtful Landscape Lighting Starts With the Right Design
Avoiding common landscape lighting mistakes begins with understanding the property before choosing fixtures.
A successful design considers architecture, landscape features, viewing angles, and how outdoor spaces will be used. Fixture placement, brightness, beam spread, color temperature, and electrical planning all contribute to a balanced result.
At Midwest Lightscaping, we create custom outdoor lighting systems for distinctive homes and properties throughout Omaha and surrounding areas.
Our approach emphasizes thoughtful design, quality materials, and careful installation. The goal is to create lighting that complements the property’s character, provides useful illumination, and performs reliably over time.
Whether you’re planning a new system or looking to improve an existing installation, our team can help assess the property and develop a lighting approach suited to its features and your priorities. Call us at (402) 509-2810 to discuss your project.